This month I have had the privilege to work with a class of talented first graders in order to teach them about computer aided design, or CAD. This is an essential tool in any engineer’s toolbox, but it using it can get very complicated very quickly. Frequent readers of this blog likely know my fondness for OnShape and it’s spiritual predecessor and industry titan, SolidWorks. These programs are far too complicated for a quick introduction in how to use CAD, and the number of features can be overwhelming. While OnShape does work on iPads, which these children are fortunate to have in their classrooms, there is a much friendlier way to introduce 3D design to children- Tinkercad.

Users create their models out of simple 3D shapes like boxes, cylinders, and pyramids just like they were building with wooden blocks. The big difference is that these blocks can be morphed and stretched like clay, letting users make pretty much whatever they want. They can set how big they are in millimeters and give a precise orientation in degrees.
Tinkercad is maintained by industry heavyweight Autodesk, which is famous for it’s CAD packages like AutoCAD and 3D art software like Maya and 3DS Max. It gives a nice set of features for beginners to computer aided design- lots of primitives and shape generators to choose from, rulers and workplanes to reference your work to and measure distances, the ability to dimension shapes, and a navigation system straight out of the best parametric modelers are all present here. This is great because it means the skills you develop learning Tinkercad transfer into using other popular packages, like OnShape or Inventor, likely the most similar Autodesk offering. As an engineer this is the biggest selling point for teaching children with this package- I know that whatever they get out of this activity, they can transfer forward to bigger and better things. This cannot be said for other programs I tried- Autodesk has another offering called 123D Sculpt that simulates making something out of clay that I found too limiting and too application specific. Microsoft Paint 3D is an impressive upgrade of the drawing program I remember, but it is more oriented towards 3D art than serious 3D part design.
That said, the activity we tackled was not one of designing parts for a rocket or model car but instead making models of the animals they were studying in their science unit. This may seem like a bad application on the surface for modeling programs like Tinkercad if the goal is to teach students how to make useful parts on 3D printers, but in my opinion it is perfect. A big part of imaging how a part should look or be designed is to imagine how it can be made out of simple shapes and figures. When working with a parametric modeler you often observe a designer create the basic shape out of circles, boxes, arcs, and lines and then begin to add the finer details. Working with something like an animal the children are familiar with is perfect for teaching this higher-level skill. It is one thing to teach them how to draw boxes and spheres and dimension them, but to teach them how to think about what they are designing and introducing them to the creative process is much more valuable than the technical skill of using the program itself. Take this elephant the children drew, for example:
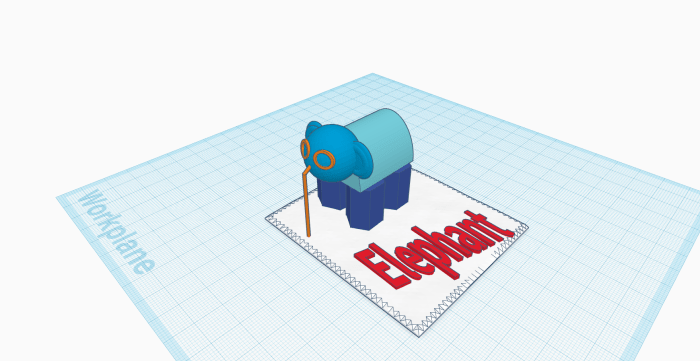
I had shown them my demo elephant, and they used it as a springboard to make their own. They identified the shapes I had used to make mine and impressed me with how they understood the creative process I had gone through to create those shapes. They then extended it by thinking of what shape they wanted to use for standing legs (I modeled mine laying down to make things easier), and what shape they wanted to use for eyes, both of which I did not have in my model! They also creatively added a baseplate for the elephant to be printed on with a label, taking advantage of the Tinkercad text tool. They were already thinking in terms of what shapes they had available to them and how they could be stretched and morphed into the figures they wanted. They were also thinking in terms of what could actually be 3D printed. These students had the privilege of having a 3D printer in the classroom and with a little coaching on my part realized why you cannot have big pieces hanging in thin air if you want a successful print, and identified that parts have to be stacked one on top of the other, not hanging in space. I taught them the ‘sandcastle principle’- imagine that you are making this model in sand. You cannot have sand floating in midair, and it won’t stay up without support. They seemed to quickly grasp the idea and they ran with it.
Here are a few of their amazing creations:


If you would like to view the presentation I gave to the students that explains some easy dos and don’ts about 3D printing and design, I’ve included it here in Google Slides format:
This was an awesome experience, and I know the students enjoyed it too. They are now obsessed with Tinkercad and 3D printing, and I have been amazed by what they have independently been creating. This is truly an awesome tool for introducing 3D art, design, and 3D printing to primary and intermediate students, as there is a lot of flexibility here for making very complicated things. I have even found that for very quick designs Tinkercad is more than adequate and it is fast. I am excited to return and work with a new set of students on another set of animals. I am sure I will be just as surprised at their creativity and inventiveness.
